本篇内容介绍了“Springboot怎么添加server.servlet.context-path”的有关知识,在实际案例的操作过程中,不少人都会遇到这样的困境,接下来就让小编带领大家学习一下如何处理这些情况吧!希望大家仔细阅读,能够学有所成!
Springboot添加server.servlet.context-path
server.servlet.context-path配置的作用
定义: server.servlet.context-path= # Context path of the application. 应用的上下文路径,也可以称为项目路径,是构成url地址的一部分。
server.servlet.context-path不配置时,默认为 / ,如:localhost:8080/xxxxxx
当server.servlet.context-path有配置时,比如 /demo,此时的访问方式为localhost:8080/demo/xxxxxx
springboot 2.0变革后的配置区别
1、springboot 2.0之前,配置为 server.context-path
2、springboot 2.0之后,配置为 server.servlet.context-path
一个思考
原来的运营项目(已上线),配置文件添加 server.servlet.context-path 配置后,需要在thymleaf 中进行action请求的追加吗?
答案:不需要。
栗子:
前端页面采取form请求
<form th:action="@{/user/userLogin}" method="post" id="userLogin"></form>action拦截接受方式
@Controller
@RequestMapping("/user")
public class LoginController {

@PostMapping("/userLogin")
public String userLogin(HttpServletRequest request, Model model) {
原项目的基础上,追加一个配置
server: port: 8080 servlet: context-path: /demo只需要再开始进入首页时,追加 localhost:8080/demo ,后续的thymleaf中的href和action等无需添加/demo 。
Springboot配置 server.servlet-path 和 server.context-path
server.context-path
设定应用的context-path.
根据 springboot版本context-path不同:
如果是springboot2.0以下,用配置server.context-path=/demo
如果是springboot2.0以上,用配置server.servlet.context-path=/demo
server.servlet-path
设定dispatcher servlet的监听路径,默认为: /
示例:
如果配置了server.servlet-path = /demo,访问路径就是http://ip:port/demo/...
不配置或server.servlet-path = /,访问路径就是http://ip:port/...
小拓展:
1.只配置了server.servlet-path = /demo,访问路径是http://ip:port/demo/...
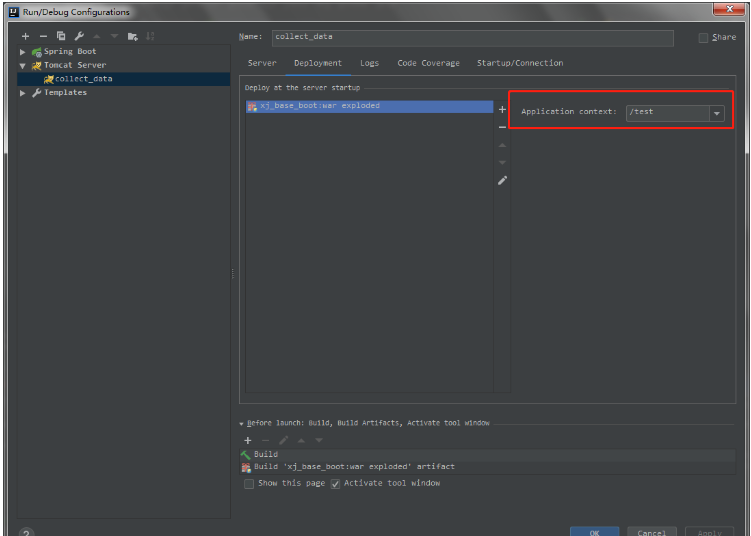
2.如果使用的idea,只在Tomcat配置了 Application context了,访问路径是http://ip:port/test/...
3.如果使用的idea,已经在Tomcat配置了 Application context了(下图),也配置了server.servlet-path = /demo,访问路径是http://ip:port/test/demo/...
